 Frostbatch
AI image too small? Upscale it 4× on your Mac
A practical guide to enlarging anime and cartoon artwork on a Mac, with a real 4× example.
A 768-pixel illustration can look clean in a small blog card and soft when stretched across a page. If you like the drawing, upscaling lets you try a larger version while keeping its composition.
For this walkthrough, I used a coding-themed illustration and enlarged it to 3072 × 2048 in Frostbatch. You can download both files, compare the glasses and hair up close, and watch the desktop app process the image.
I build Frostbatch, the Mac app used in this example. The illustration was generated with AI for this article. The enlarged image below came from Frostbatch’s Illustration setting (the Real-ESRGAN anime model).
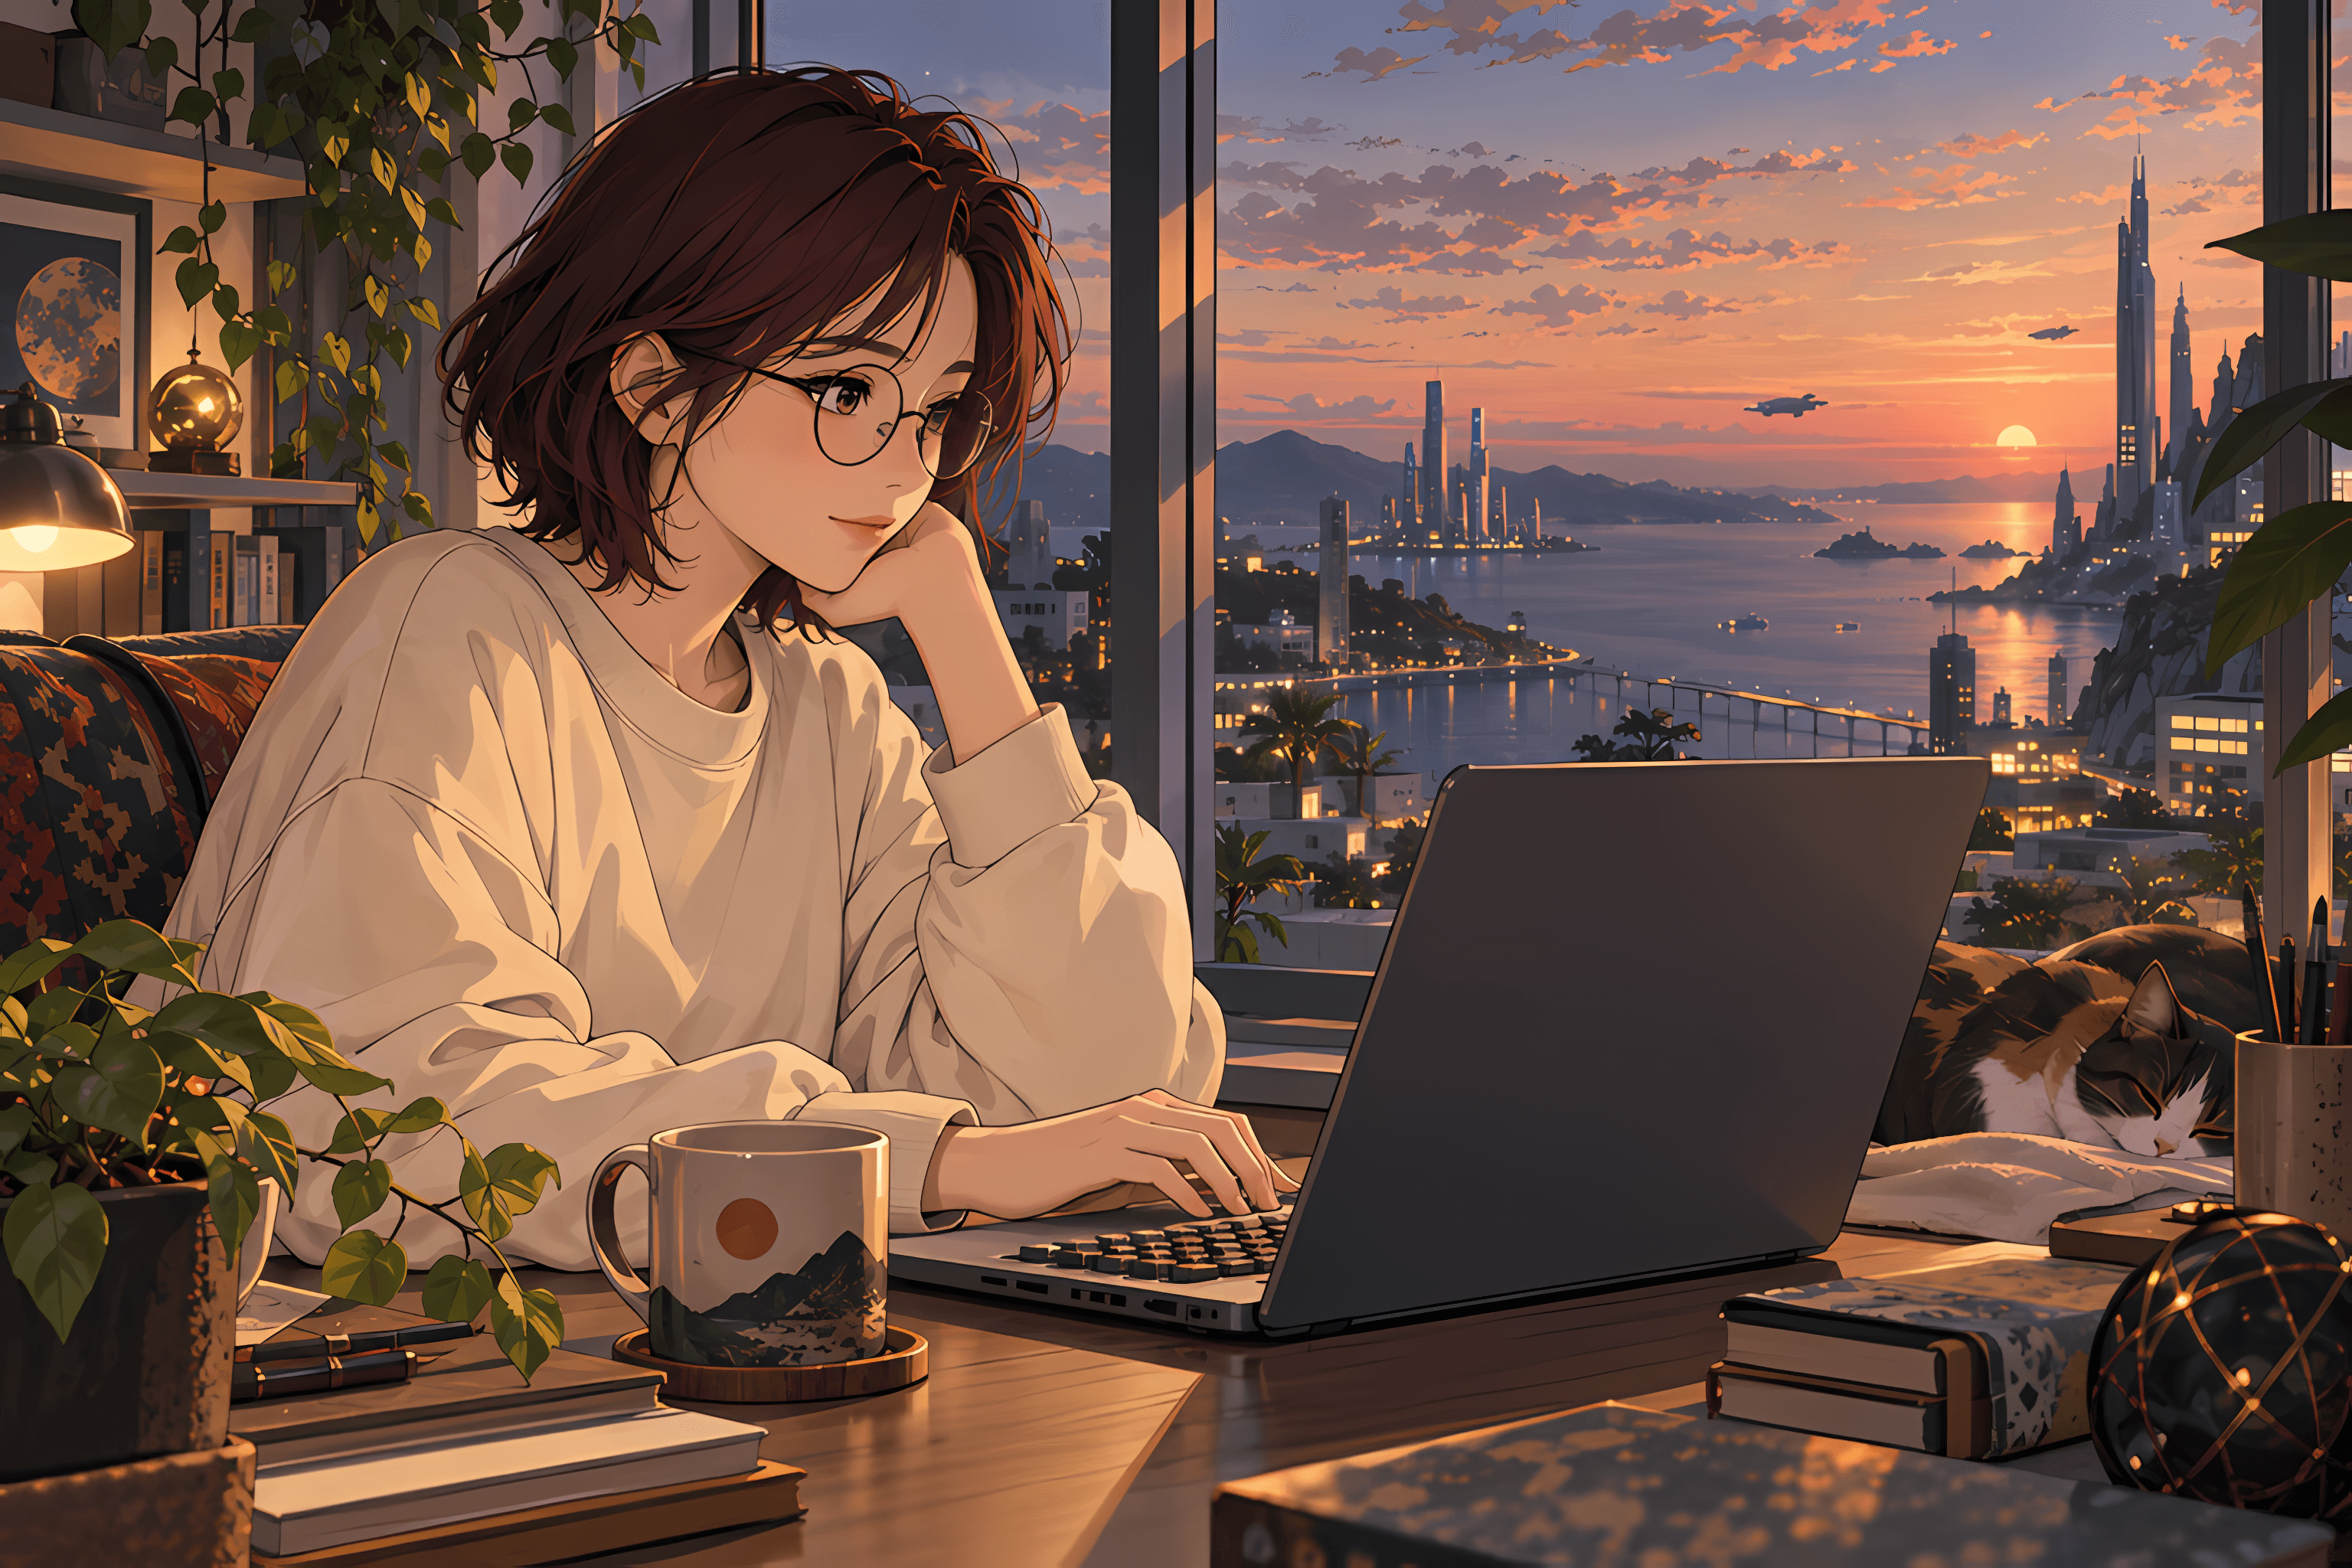
The actual 4× output from Frostbatch, shown at page width. The 768 × 512 input and a close-up comparison are below.
Free generators to try with smaller images
For a small-source experiment, start with Draw Things or Leonardo. Both document generation settings below 1024 pixels. These are available sizes, not permanent limits on what the tools can create.
| Generator | Free option | Size to look for |
|---|---|---|
| Draw Things | Local image generation on your Mac. Download a compatible model first; optional cloud features are separate. | Its Qwen Image guide demonstrates 512 × 512 generation, alongside larger sizes. Use a small setting when you want to test this workflow. |
| Leonardo.Ai | A daily free token allowance. Model and feature choices affect the cost. | Its token guide lists a 768 × 768 default-image option. Newer models and other settings can produce different sizes. |
| Ideogram | A free plan with limited generation capacity. | The 4.0 model documentation includes 1024 × 1024 square output. Check the selected resolution tier; this is a model example, not a free-plan size guarantee. |
| Craiyon | Limited free generation at base quality, with watermarks. | Its current FAQ does not specify a fixed pixel size for free downloads. Check the saved file rather than assuming the older 256 × 256 figures still apply. |
Bing Image Creator and Adobe Firefly are two more free options. Bing requires a personal Microsoft account; Firefly limits free generations. Neither needs to produce a tiny image to be useful here: the question is whether the download has enough pixels for your intended use.
On a Mac, select the downloaded file in Finder and press Command–I to check its dimensions. A 512 × 512 image becomes 2048 × 2048 at 4×; a 768 × 768 image becomes 3072 × 3072. For an existing project, keep the largest source available. There is no benefit in shrinking it just to run an upscale.
Choose the drawing before enlarging it
Describe what should be in the image and how it should be drawn. For this example, the brief was an anime-style programmer at a desk, with warm evening light and fine outlines around the hair and glasses.
Here’s a shorter prompt to try:
An original anime illustration of a programmer working by a window at sunset. A quiet coastal city outside, a laptop and ceramic mug on the desk. Fine ink outlines, cel shading, warm cream and terracotta colors. No lettering or logos.
Look at the image before enlarging it. If the hands are wrong or the laptop has melted into the desk, fix that in the generator or an image editor. An upscaler can make the same mistake larger and sharper.
Save the actual download rather than a screenshot of the preview. Keep the largest original the generator provides. Reducing a perfectly good source and enlarging it again is unnecessary in normal use; the smaller copy in this article exists to make the test repeatable.
What the AI does during upscaling
Image generation and upscaling solve different problems. A generator turns a description into a composition. An upscaler starts with an existing image and estimates how its details should look at a higher resolution.
A conventional resize calculates new pixels from nearby colors. A learned upscaler also uses patterns from its training: how an edge, a strand of hair, or a patch of texture tends to look. That can produce a cleaner-looking enlargement, but it also means the model can change details.
Frostbatch uses Real-ESRGAN. Its researchers trained the restoration system with synthetic degradation, making training examples that simulate problems in lower-quality images. The Real-ESRGAN paper explains that approach. The project provides a separate model optimized for anime illustrations, which is the one selected here.
For drawings with clear outlines and flat shading, the Illustration setting is a useful starting point. Try Photo for photographic material. Inspect the result either way, especially small faces, lettering, and thin lines. A plausible new detail is not proof that the detail existed in the source.
The example: 768 × 512 to 3072 × 2048
For this test, the generated 1536 × 1024 artwork was reduced to a 768 × 512 PNG using Lanczos resizing. Frostbatch then enlarged that file by 4× in each direction, producing a 3072 × 2048 PNG. The output contains sixteen times as many pixels. The close-ups show how those extra pixels affect the drawing.
The smaller input makes the changes around the glasses and hair easier to compare. The results here apply to this illustration and these settings.
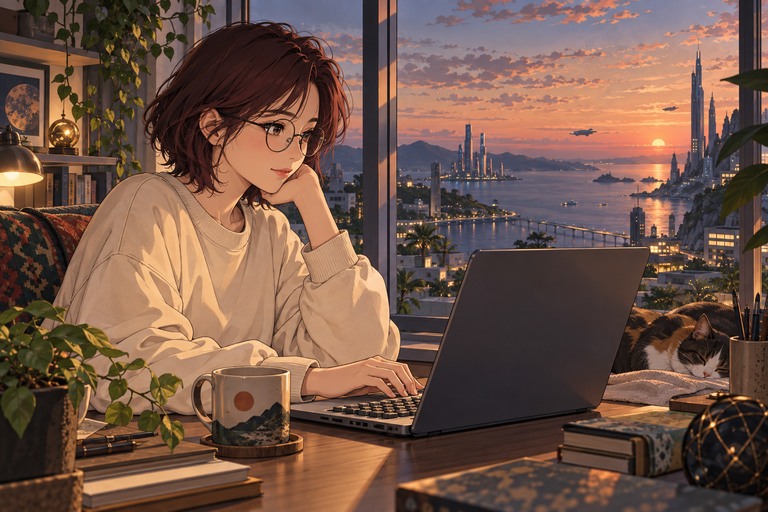
The exact input sent to Frostbatch. It is a reduced copy of the 1536 × 1024 generated artwork, not the generator’s native output resolution.
Download the test input · Download the actual 4× output
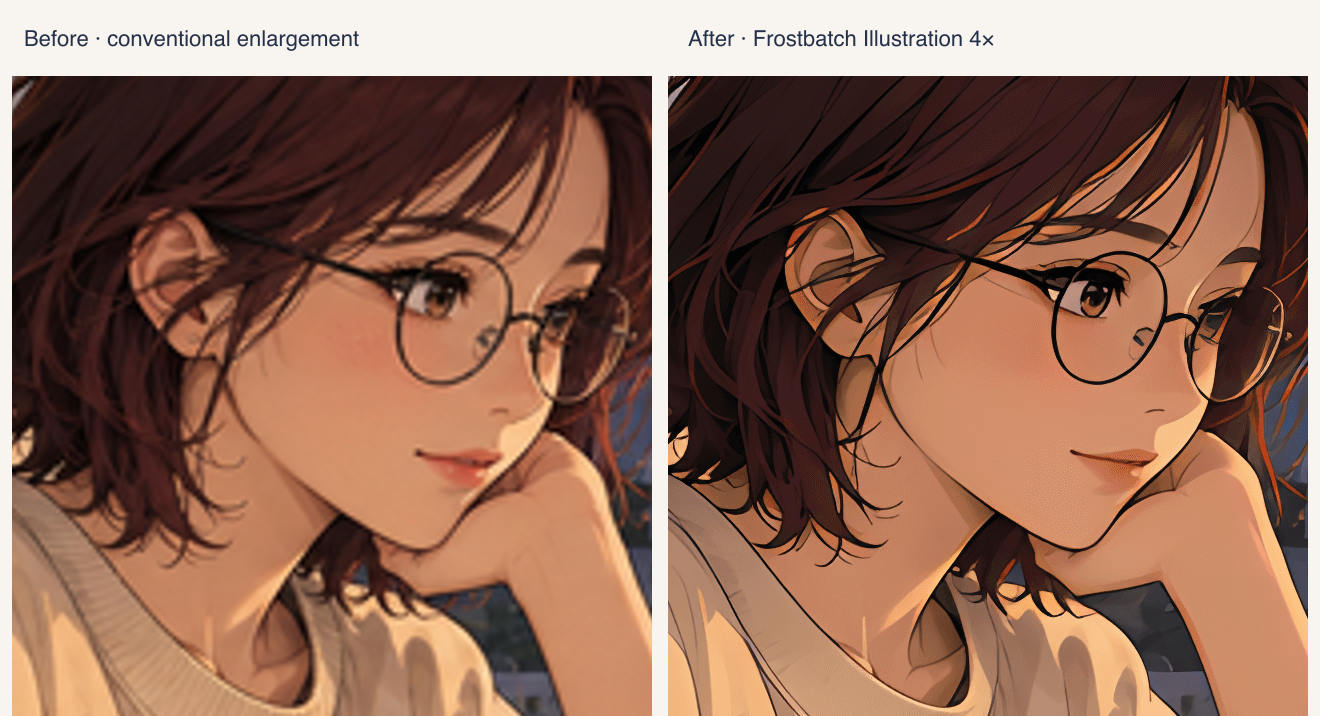
The same region at the same display size. Left: the input enlarged with cubic interpolation. Right: the actual Illustration 4× output. Both crops are saved as PNG, with no extra sharpening.
Watch it run in Frostbatch
The app segment is a continuous recording at normal playback speed, followed by the matching before-and-after close-ups. Image processing is real; the native save dialog is automated for the recording.
To repeat the example:
- Add the downloaded PNG to Frostbatch and choose Archive to keep the input untouched.
- Choose Original under size. This avoids applying a smaller resize after the upscale.
- Select PNG for output so this comparison does not add lossy encoding artifacts.
- Turn on AI Upscale, choose Illustration (the anime model), and process the image.
- Save the archive and open the result at 100% to inspect it.
The desktop upscaling step runs locally on your Mac. Generating the source image in an online service is a separate step. Frostbatch is a paid Mac app.
Check the lines, then the whole picture
In the close-up, the glasses have a more continuous outline and the hair edges look cleaner after upscaling. Fine texture around the face is smoother, too. If you prefer that texture in the input, the sharper outline may not be worth the change.
Distant city windows need a different kind of scrutiny: the model can turn a blur into a convincing mark without knowing what was there. The same applies to tiny lettering. Keep text you need people to read in an editable text layer.
Check the image at the size you plan to use, too. A difference that is obvious in a close-up may be barely noticeable in a small blog card. If the original already looks clean there, you may not need to upscale it.
For cartoon artwork, inspect the silhouette and areas of flat color. For anime, pay particular attention to the eyes, eyelashes, and hair. Reject a version that changes the expression or removes texture you wanted to keep.
Export for where the image will live
Keep the enlarged PNG as a master. For a website, make a separate copy at the dimensions you need and compare WebP or AVIF exports against it. Enlarging an image adds pixels and can increase its file size; it does not automatically optimize it for the web.
If the picture will appear at 1200 pixels wide, test that export on the actual page before uploading the full 3072-pixel version. For print, check the required pixel dimensions with the printer rather than relying on a “4×” label.
You can try Frostbatch for Mac with the sample file above. The sample PNG and full output are linked above, so you can inspect them before installing anything.